How to Use a Knee Scooter in Albuquerque
How to Use a Knee Scooter in Albuquerque? A knee scooter, or knee walker, can be a great alternative to crutches after sustaining an orthopedic injury. Knee scooters provide users with a comfortable and smooth mode of mobility and have the potential to expedite the recovery and healing process. However, when utilizing knee scooters as a mobility aid, it’s important to remember that proper usage is the key to having a safe and comfortable experience.

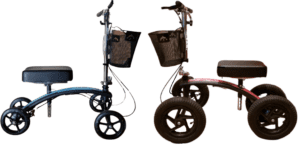
When choosing a knee scooter, it’s also important to decide on the type of scooter you would like to use. As many models exist to serve the same purpose, the two main knee scooter categories that can affect your mobility experience are the standard and the all-terrain models. While the two categories have differences in model specifications, there are little to no differences with the way that they work and operate.
When getting your knee scooter, there are 5 main adjustments that you should make in order to ensure a safe and comfortable experience:
Lock Your Brakes!
Locking your brakes is the first thing you should do before setting up your knee scooter as it remains essential in maintaining the safety of users. By starting with a locked scooter, you can prevent unwanted movement and rolling while you adjust your knee scooter to meet your desired levels of comfort.
Adjust Your Seat Height
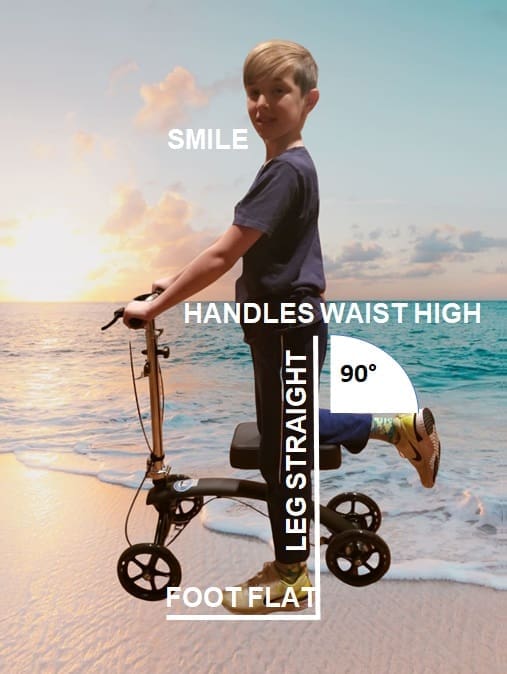
When adjusting your seat height, it’s important to maintain an upright vertical position from the top of your head to your uninjured/healthy leg. The knee pad should allow your injured leg to rest at a 90 degree position from your body. This position allows equal weight distribution between your injured leg, your knee scooter, and your uninjured leg, minimizing further damage to your recovering injury.

- Remove the locking pin from the seat post
- The first step in adjusting your seat is to remove the pin located under the seat pad in the base of the seat post. This pin serves as the main locking mechanism for the seat.
- Loosen the seat post clamp
- Once the pin is removed, the seat will be held up by a locking clamp located on the seat post. Once loosened, the seat should be able to slide up and down to meet your desired height.
- Raise and lower the seat to your desired height
- After removal of the pin and loosening of the clamp, you should be able to slide your seat to match your desired height. The seat should sit at a position that allows you to rest your injured leg at a 90 degree angle while maintaining a vertical body position from your head to the bottom of your uninjured leg.
- Align the adjustment holes, re-insert the pin, and tighten the clamp.
- Once you have determined the height you would like to set your seat at, align the holes of the seat post to match the outer holes of the knee scooter’s frame. When you have made the appropriate adjustments, insert the pin at the base of the seat frame and tighten the clamp.
Video Tutorial: https://youtu.be/oAd_8At26VI
Adjust Your Handlebars
Handlebar height is important in ensuring a safe experience for knee scooter users. When standing properly with your injured leg at a 90 degree angle, the handlebars of the knee scooter should align with your waist- allowing your arms to comfortably rest at a vertical standing position.
- Remove the locking pin from the handlebar post
- The first step in adjusting your handlebar is to remove the pin located on the handlebar post. This pin serves as the main locking mechanism for the handlebar.
- Loosen the handlebar clamp
- Once the pin is removed, the handlebars will be held up by a locking clamp located on the post. The handlebars should be able to slide up and down to meet your desired height.
- Raise and lower the handlebars to your desired height
- After removal of the pin and loosening of the clamp, you should be able to slide your handlebars to match your desired height. The handlebars should rest at waist height, allowing your arms to rest comfortably while standing tall.
- Align the adjustment holes, re-insert the pin, and tighten the clamp.
- Once you have determined the height you would like to set your handlebars at, align the holes of the post to match the outer holes of the knee scooter’s frame. When you have made the appropriate adjustments, re-insert the pin and twist to secure before tightening the clamp.
Video Tutorial: https://youtu.be/TtwH8hEIX8c
Folding Your Scooter for Storage/Transport
When not in use, folding your knee scooter is as simple as completing 3 steps.
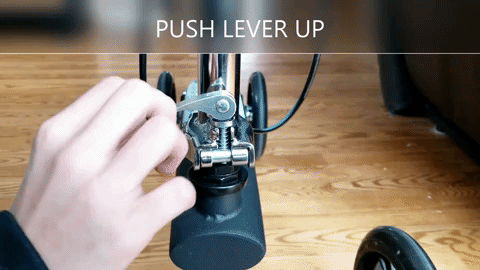
- Push the lever up
- At the base of the handlebar post and below the handlebar adjustment, is a fold-down lever. To fold your scooter down, push the lever up and pull it down to expose a pin.
- Squeeze to Unlock The Pin
- After pulling the lever down, squeeze the lever sideways to unlock the pin. After unlocking the pin, the handlebar post should be able to fold backwards.
- Unfolding the Knee Scooter
- To unfold the knee scooter, bring the handlebar post back up to its vertical position, squeeze the lever again to re-engage the pin, and re-attach and secure the lever.
Once these steps have been completed you may unlock your brakes and safely operate your knee scooter!
For more information on knee scooters, video-tutorials, rentals, and FAQ’s please visit www.kneescooterusa/com.